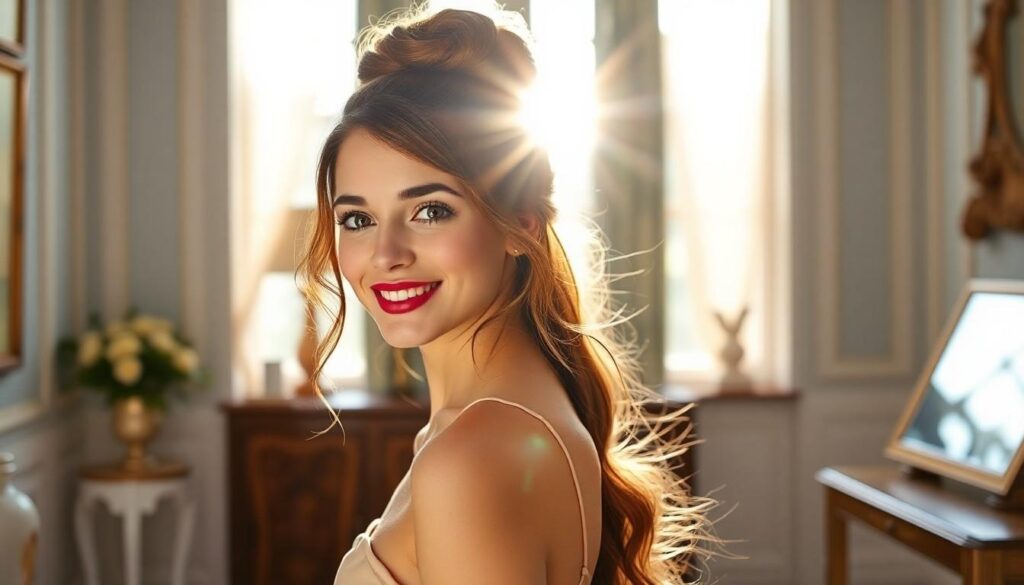
Looking for a versatile hairstyle that never goes out of fashion? Bun hairstyles are the perfect solution for anyone seeking elegance, convenience, and style all wrapped into one look. We’ve seen buns evolve from simple updos to statement-making styles that work for everything from casual coffee runs to formal weddings.
Whether you’re dealing with second-day hair or preparing for a special occasion, bun hairstyles offer endless possibilities. From sleek ballerina buns to messy top knots, there’s a version that complements every face shape, hair length, and personal style. The best part? Most bun styles take just minutes to create but look like you’ve put in hours of effort.
10 Elegant Bun Hairstyles for Every Occasion
1. Classic Ballerina Bun
The classic ballerina bun offers timeless elegance for formal events and professional settings. Pull your hair into a high ponytail, twist it around the base, and secure with bobby pins for a polished look. Adding a bit of hairspray will help tame flyaways and maintain the sleek appearance throughout the day. This versatile style works beautifully for wedding guests, job interviews, or sophisticated dinner parties.
2. Messy Top Knot
A messy top knot provides effortless chic for casual outings or relaxed weekends. Gather your hair loosely at the crown of your head, twist it into a bun, and secure while leaving some pieces free for that perfectly undone effect. We love how this style can be created in under two minutes yet still looks purposefully styled. Try texturizing spray beforehand to enhance volume and grip.
3. Low Chignon
The low chignon exudes sophistication perfect for formal occasions like weddings or galas. Create a center or side part, gather hair at the nape of your neck, twist or braid it, then wrap into a bun and secure. Decorative pins or fresh flowers can elevate this already elegant style. Many celebrities choose this timeless option for red carpet appearances due to its refined appeal.
4. Half-Up Bun
Half-up buns blend playfulness with sophistication for versatile daytime styling. Take just the top section of your hair, create a small bun, and leave the rest flowing freely for a youthful yet put-together appearance. This style works wonderfully for brunch dates, shopping trips, or casual office environments. Curling the loose portion adds extra dimension and romantic flair.
5. Braided Bun
Braided buns incorporate intricate texture for eye-catching formal styles. Create one or multiple braids, then wrap them around to form a bun shape at your desired height. Celebrities frequently showcase this detailed style at award shows and premieres. Wedding guests and bridesmaids particularly favor this sophisticated option for its ability to stay secure through hours of celebration.
6. Sock Bun
Sock buns deliver perfect donut-shaped volume for polished everyday wear. Use a sock or foam donut, pull your ponytail through the center, and wrap hair around while tucking ends underneath. This technique creates impressive size and symmetry that’s difficult to achieve freehand. Dance recitals and performances often feature this style for its clean lines and dramatic presentation.
7. Space Buns
Space buns bring playful symmetry for festivals and casual outings. Divide your hair into two equal sections, create high ponytails on either side, twist each into a bun, and secure with pins. This fun style has gained tremendous popularity at music festivals and trendy social events. Adding colorful accessories or glitter can enhance the whimsical effect for special occasions.
8. Twisted Bun
Twisted buns incorporate elegant coiling for a distinctive formal style. Separate your hair into sections, twist each piece, then wrap and pin them to create a textured bun shape. Wedding hairstylists frequently recommend this option for brides seeking something more intricate than a classic chignon. The dimensional quality catches light beautifully in photographs.
9. Side Bun
Side buns create asymmetrical interest for romantic evening looks. Sweep all your hair to one side, twist it into a bun near your ear, and secure with pins while leaving a few face-framing tendrils. Red carpet events often showcase this glamorous style paired with statement earrings on the exposed side. Professional photoshoots favor this angle for its flattering profile view.
10. Bubble Bun
Bubble buns feature segmented texture for modern special occasion styling. Create a ponytail, add elastic bands every inch or so down its length, gently tug each section for fullness, then fold the tail under and pin to form a bun. Instagram beauty influencers have popularized this contemporary take on the traditional updo. Fashion-forward events provide the perfect opportunity to showcase this innovative style.
The Classic Ballerina Bun: Timeless Elegance for Formal Events
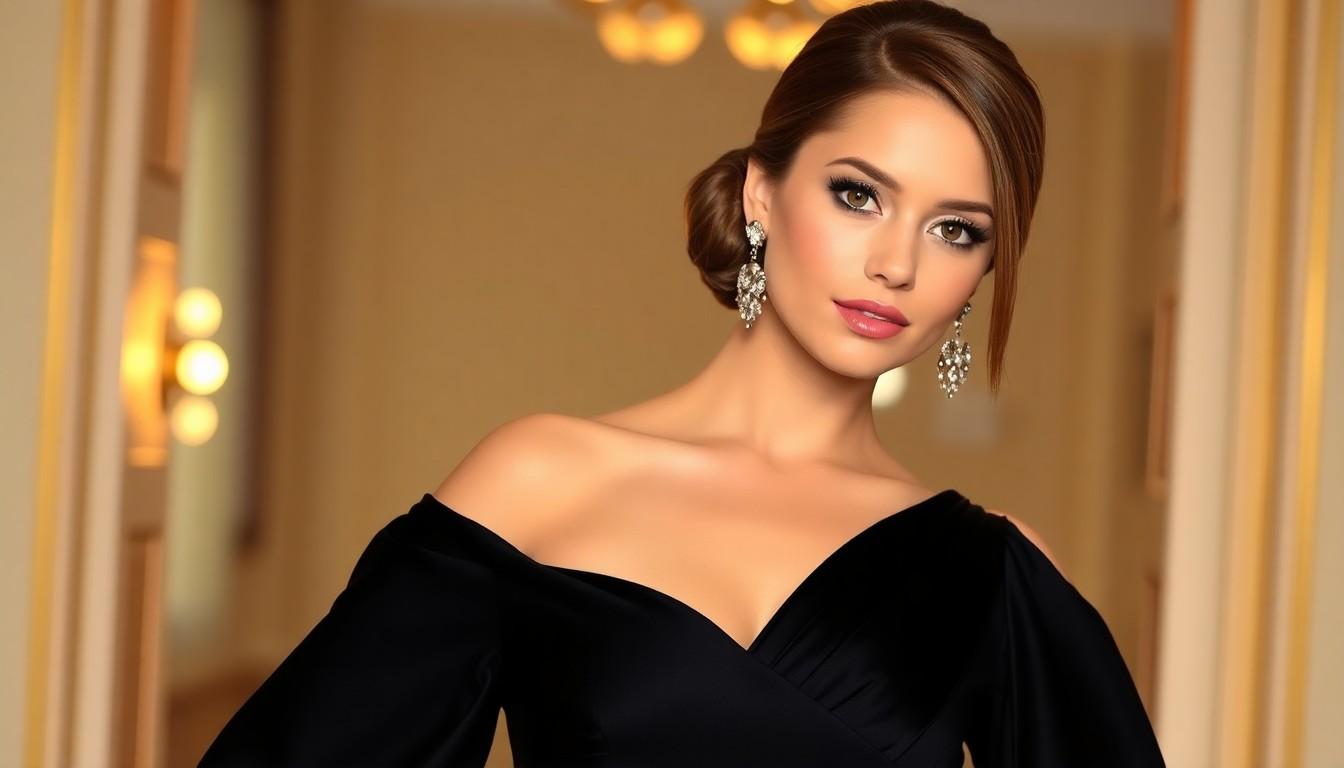
The ballerina bun stands as a timeless and elegant hairstyle perfectly suited for formal events while also offering versatility for everyday wear. Originally designed for ballet dancers to withstand intense performances, this sleek updo delivers a clean, minimalist finish that stays in place all day long. Whether you’re attending a wedding, evening party, or heading to the office, the ballerina bun pairs beautifully with oversized earrings and a bold red lip for an elegant evening look, or can be styled simply for a professional setting.
Step-by-Step Tutorial for the Perfect Ballerina Bun
Creating a flawless ballerina bun doesn’t require professional styling skills—just a few simple steps and basic hair tools. First, gather all necessary materials including a comb, hair tie, bobby pins, and hairspray before beginning the process. Start by thoroughly brushing your hair to remove any tangles, ensuring a smooth foundation for your bun. Secure your hair into a high ponytail, positioning it at the crown of your head for the classic ballerina look. Next, twist the ponytail tightly and wrap it around the base to form the characteristic bun shape. Use bobby pins strategically to secure any loose strands and hold the bun firmly in place throughout your event. Finish with a light mist of hairspray to maintain stability and eliminate flyaways, giving your ballerina bun lasting power throughout the day or night.
Best Hair Types for Ballerina Buns
The versatility of ballerina buns makes them suitable for various hair types and textures with minor adaptations. Long hair works exceptionally well for this style, providing enough length to create a fuller and more secure bun that maintains its shape. Medium-length hair can also achieve beautiful ballerina buns, though additional styling products may be necessary to enhance hold and prevent loose ends. All hair textures—straight, curly, or wavy—can be styled into elegant ballerina buns with appropriate preparation techniques. For curly or wavy hair types, applying a smoothing serum or light hold hairspray before styling helps manage flyaways and adds a gorgeous shine to the finished look. The adaptability of this classic updo allows anyone to enjoy its polished appearance regardless of natural hair texture.
Messy Bun Magic: Effortless Everyday Style

The messy bun represents the perfect balance of style and simplicity, offering a chic look that appears effortlessly undone while still being put together. Let’s explore how to master this versatile hairstyle that works for errands, office days, or casual outings.
Quick 2-Minute Messy Bun Technique
Creating a messy bun doesn’t require professional styling skills or hours in front of the mirror. Start by pulling your hair into a loose ponytail, either high or low depending on your preference. You can flip your head upside down to gather all your hair more easily for a fuller look. Next, hold the ponytail with one hand while using your other hand to twist and wrap the hair around the base, intentionally leaving the tail out to create that coveted messy appearance. Secure your creation by wrapping the twisted hair loosely around the hair tie until all strands are swept into a coil formation. Bobby pins should be strategically placed at the front, back, and sides to keep everything in position while maintaining that casual, undone vibe.
Another effective approach involves bringing your ponytail to one side, holding the base firmly, and using a second hair tie to wrap over the top. Then simply pass your hand through the loop and flip it over to secure the bun in place. For added dimension, pull out a few face-framing pieces before securing your ponytail, improving the effortless, carefree aesthetic that makes messy buns so appealing.
How to Make Your Messy Bun Stay All Day
Volumizing your ponytail forms the foundation of a long-lasting messy bun. Use your fingers to thoroughly comb through your hair before pulling it into a high, tight ponytail. Gentle teasing from roots to ends with a fine-tooth comb sprayed with hairspray creates essential texture and volume that helps maintain the style throughout the day.
Concealing the hair tie properly contributes significantly to both the appearance and longevity of your messy bun. Wrap your teased ponytail loosely around the hair tie, creating coils until all hair is incorporated, then secure with several strategically placed bobby pins for maximum stability.
The tuck-and-pin technique prevents your carefully crafted bun from falling apart mid-day. Tuck any stray ends around the base of the bun and secure them with additional bobby pins, then gently pull on sections of the bun to achieve your desired level of messiness. A light spritz of hairspray sets the style effectively, while pinching and pulling at the crown and back of your head creates additional volume for a more relaxed, effortlessly stylish appearance.
Final adjustments make all the difference in the overall look of your messy bun. Split the bottom section into two pieces, twist them around your finger, and crisscross them over the bun before securing with bobby pins for a more elaborate style that still maintains that casual, undone charm.
Sleek Low Bun: Professional Polish for the Workplace

The sleek low bun stands out as a versatile and professional hairstyle perfectly suited for workplace environments. This sophisticated style keeps hair neat and out of the face while projecting confidence and competence in both formal and semi-formal work settings. Working well with most hair textures, it’s particularly flattering for those with straight or slightly wavy hair, though those with curlier locks can achieve this look with the right products and techniques.
Products to Achieve a Frizz-Free Low Bun
Creating a polished, frizz-free low bun requires having the right arsenal of hair products at your disposal. Hair serum or oil serves as an essential first step, helping to smooth the hair and combat frizz when applied in small amounts before styling. Smoothing cream works wonders as a pre-styling product to tame unruly strands and add a professional-looking shine to your finished bun. Quality hair ties and bobby pins that match your hair color provide invisible support, securing your bun without drawing attention to the accessories themselves. Finishing with a light-hold hairspray ensures your sleek look stays put throughout your workday, preventing flyaways and maintaining that polished appearance professionals need.
Accessorizing Your Low Bun for Extra Sophistication
Elevating your low bun with tasteful accessories can transform this classic style into something truly distinctive for workplace settings. Simple hair pins or barrettes add subtle elegance without overwhelming your professional look—opt for understated designs in neutral tones or minimal metallic finishes. Thin headbands introduce an additional layer of sophistication when chosen in simple, workplace-appropriate styles that complement rather than dominate your overall appearance. Earrings play a crucial role in framing your face when wearing a low bun; select simple, elegant options that enhance your professional image without becoming a distraction. Pairing the right accessories with your sleek low bun creates a balanced, sophisticated look that communicates attention to detail and professional polish.
Half-Up Bun Styles: The Perfect Casual-Chic Compromise

Half-up bun styles offer the perfect balance between casual and chic, making them incredibly versatile for various occasions. These styles combine the polished look of an updo with the relaxed feel of wearing your hair down, creating a harmonious compromise that works for everyday wear and special events alike.
Top-Knot Half-Up Bun Variations
The classic half-up top knot involves securing just the top section of hair into a neat bun while leaving the rest flowing freely, creating an instantly polished yet effortless appearance. For those seeking a more intricate style, the braided half-up top knot incorporates beautiful woven elements, such as a fishtail or regular braid, into the top section before forming it into a bun. Both variations maintain the essential characteristic of this style – pulling the upper portion of hair up while allowing the lower section to remain loose, resulting in a balanced look that’s both put-together and relaxed. These styles work exceptionally well for transitioning from day to evening events without requiring a complete hairstyle change.
Face Shapes That Rock the Half-Up Bun
Round faces benefit tremendously from half-up buns as they create a lengthening effect, with higher placement of the bun adding helpful vertical dimension to balance facial proportions. Oval faces have a natural advantage with this style, as their symmetrical proportions complement the half-up bun perfectly, improving their balanced features without overpowering them. Square-faced individuals should opt for softer half-up buns with minimal volume on top to soften angular jawlines and create a more rounded appearance. Heart-shaped faces look best with lower-positioned half-up buns that don’t add excessive height at the crown, helping to balance broader foreheads with narrower chins. Those with triangular face shapes can use the half-up bun strategically by adding width to the top portion of their face, creating visual balance with their broader chin area. The adaptability of this style across different face shapes highlights its universal appeal and explains why it remains a popular choice for various occasions.
Braided Bun Combinations: Adding Texture and Interest
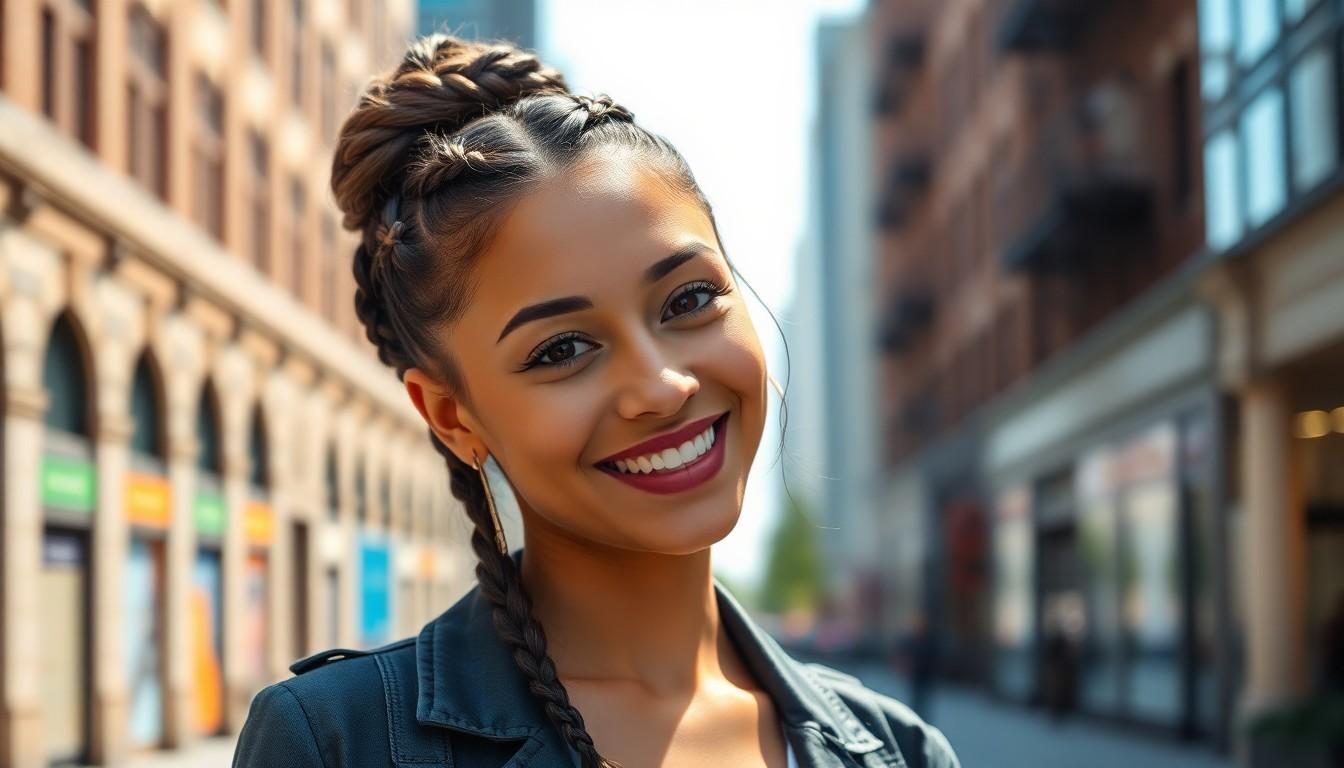
Braided bun combinations elevate the traditional bun by incorporating intricate woven patterns that add dimension and visual interest. These styles blend the security of a bun with the artistic appeal of braids, creating sophisticated looks suitable for various occasions.
Double Stitched Bun
The double stitched bun features two distinct braided sections woven into or around the main bun structure. Women with voluminous and textured hair particularly benefit from this style as it showcases their hair’s natural fullness. This elegant option makes a statement at high-profile events where a more dramatic hairstyle is desired. For maximum impact, secure the braided sections firmly while maintaining some volume throughout the style.
Braided Bun With Fishtail Accents
Fishtail braiding transforms a simple bun into a contemporary masterpiece when used as an accent rather than the central focus. Many stylists create low buns with fishtail braiding intricately woven around the base, displaying remarkable creativity and modern flair. Wedding hairstylists frequently recommend this option for city brides who prefer cutting-edge themes and customized wedding dresses. The detailed nature of fishtail accents adds sophistication without appearing overly complicated.
Messy Braided Bun
The messy braided bun offers an effortless and casual alternative to perfectly polished styles. This versatile option combines slightly disheveled braiding with face-framing strands that create a relaxed yet put-together appearance. Accessories can easily elevate this style for more formal settings while maintaining its approachable charm. Casual events and beach weddings often feature this style for its perfect balance of simplicity and eye-catching design.
Dutch Braid to Bun Tutorial
Creating a Dutch braid to bun requires just a few simple steps for a textured, sophisticated result. Begin by forming a Dutch braid (also called an inside-out braid) from the crown of your head, working with the hair positioned away from your face. Continue braiding until you reach the ends of your hair, securing with a small elastic if needed. Next, coil the completed braid into a circular bun shape at your desired height. Secure the bun thoroughly with bobby pins, placing them in a crisscross pattern for maximum hold. Finally, adjust any sections to ensure evenness and apply hairspray to maintain the style throughout the day.
Fishtail Braid Bun for Special Occasions
The fishtail braid bun delivers elegant sophistication perfect for weddings, galas, and formal events. Start by creating a sleek fishtail braid from the crown of your head, dividing your hair into two equal sections. Work the fishtail technique to your desired length, ensuring the braid remains tight and defined throughout. Once completed, wrap the fishtail braid into a circular bun shape, positioning it according to your preference—low for classic elegance or higher for a more dramatic effect. Secure the style with strong bobby pins that match your hair color for a seamless finish. This distinguished style pairs exceptionally well with modern wedding themes and customized formal attire, creating a cohesive and refined look.
Space Buns: Playful Double Bun Hairstyles
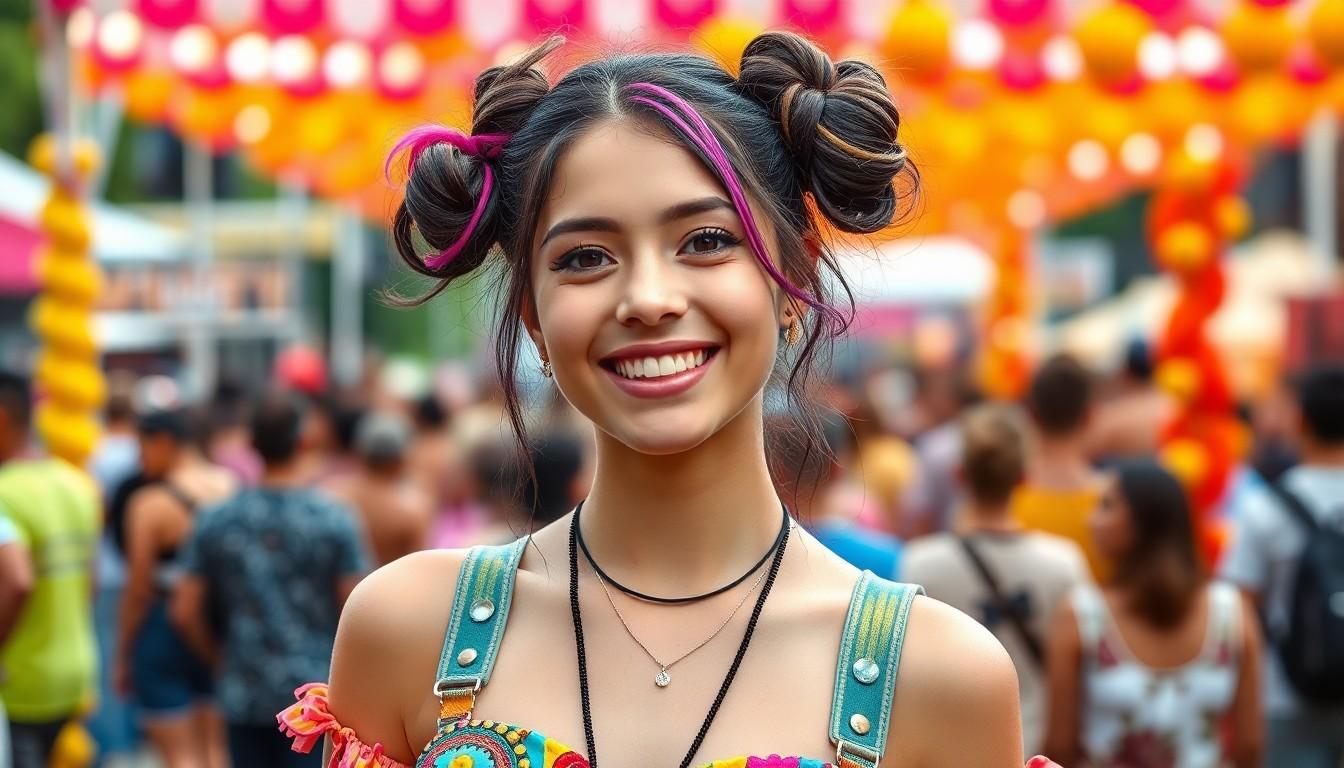
Space buns have become an iconic hairstyle choice for those seeking a fun, youthful look that stands out from traditional updos. This playful double bun style offers versatility while remaining relatively simple to create, making it perfect for festivals, casual outings, or anytime you want to add a touch of whimsy to your appearance.
How to Create Symmetrical Space Buns
Creating perfectly symmetrical space buns requires attention to detail from the very beginning of the styling process. Start by brushing your hair thoroughly to remove any tangles or knots that might interfere with the symmetry of your buns. Part your hair straight down the middle to divide it into two equal sections – this straight center part is crucial for achieving balanced buns.
Next, gather each section into high ponytails positioned at the same height on either side of your head. Making sure these ponytails are even in both thickness and height will create the foundation for symmetrical buns. Secure each ponytail with an elastic band, ensuring they’re positioned identically on both sides.
To form the buns, wrap each ponytail around its base, creating a circular shape. You can achieve this by pulling the hair through the elastic halfway, then repeating the process to fold the hair in half twice. Secure the ends with bobby pins, tucking them underneath the bun for a neat finish.
For the final adjustments, look in a mirror to check that both buns are at the same height and appear even. We recommend gently tugging on the buns to align them properly if needed. Adding a few extra bobby pins will help secure any loose strands and maintain the symmetry throughout the day.
Festival-Ready Space Bun Variations
Festival season calls for hairstyles that are both practical and eye-catching, making space buns a popular choice among festival-goers. To create festival-ready space buns with extra volume, start by applying texture spray to your hair before styling. Backcomb each ponytail section before wrapping it into a bun to add important volume and create a more dramatic festival look.
Accessories can transform basic space buns into a true festival statement. Add glitter, colorful hair ties with charms, or decorative clips to enhance your buns. Temporary hair color spray applied to the buns creates a bold, festival-appropriate style that will stand out in the crowd.
Half-up space buns offer another festival variation that works wonderfully for those who want to show off their length while keeping hair off their face. Create two small buns at the crown of your head while leaving the rest of your hair flowing freely. This style perfectly balances practicality with playful aesthetics, keeping you cool while looking stylish throughout long festival days.
For added texture and interest, try incorporating braids into your space buns. Begin by creating two Dutch or French braids from your hairline back toward where your buns will sit, then wrap the remaining hair into buns. This braided space bun variation adds intricate detail that’s perfect for festival settings where unique hairstyles are celebrated and admired.
Side Bun Elegance: Asymmetrical Sophistication
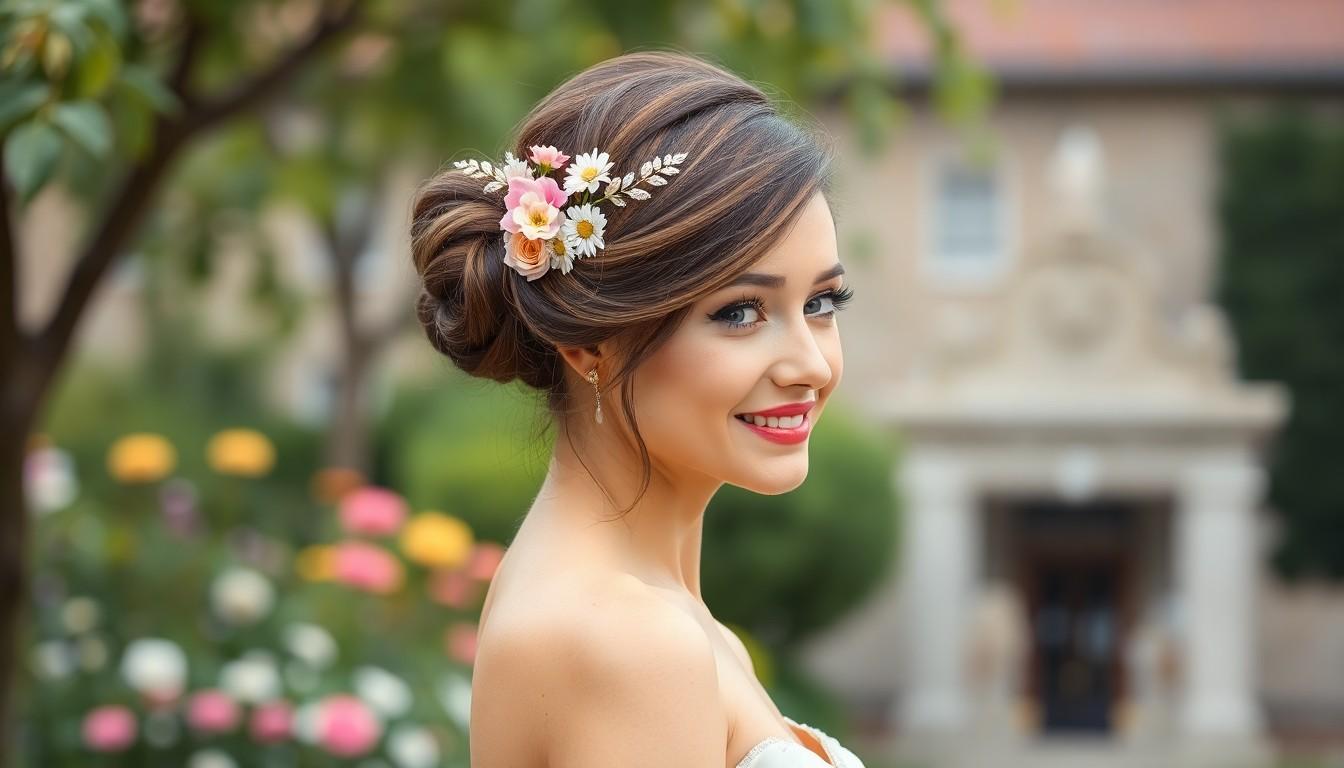
The side bun offers a refreshing asymmetrical sophistication that can instantly elevate any look. This stylish variation places the bun off-center, creating a slimming effect while beautifully elongating the neck for a more refined appearance.
To create this elegant style, begin by brushing your hair toward your preferred side. Gather all your hair into a side ponytail and secure it with an elastic. Next, twist the ponytail and coil it into a bun shape, anchoring it firmly with bobby pins. For a softer finish, consider leaving a few delicate strands loose around your face to frame it perfectly.
Romantic Side Bun Styles for Weddings
Wedding-ready side buns exude romance and timeless elegance, making them perfect for brides and wedding guests alike. Start by creating a low ponytail positioned on one side of your head, then braid or twist the hair before coiling it into a sophisticated bun shape.
Enhance your wedding side bun with decorative elements such as fresh flowers, ornate hairpins, or pearl accents that complement your overall look. These additions transform a simple side bun into a statement bridal hairstyle.
Traditional styles like the Indian “khopa” offer beautiful inspiration for wedding side buns. This technique involves creating a braid first, then folding it upward to form a structured yet romantic bun that holds beautifully throughout your special day.
Quick Side Bun Hacks for Beginners
Divide and Conquer: Breaking your hair into manageable sections makes creating a side bun much easier. Form a low side ponytail first, then braid or twist the remaining sections before incorporating them into your bun structure.
Use Texture Spray: Adding a quality texture spray to your hair before styling gives your side bun more volume and staying power. This simple step ensures your creation looks professionally styled all day long.
Secure with Bobby Pins: Master the art of strategic bobby pin placement to keep your side bun secure. Insert pins in a crisscross pattern for maximum hold, while leaving a few face-framing pieces loose creates that effortlessly chic vibe.
Create a Hole: Try the hole technique for seamlessly integrating braids into your side bun. Form a small opening behind your ponytail elastic and pull your braid through this space to create dimension and interest in your finished style.
Sock Bun Technique: Creating Perfect Donut Buns
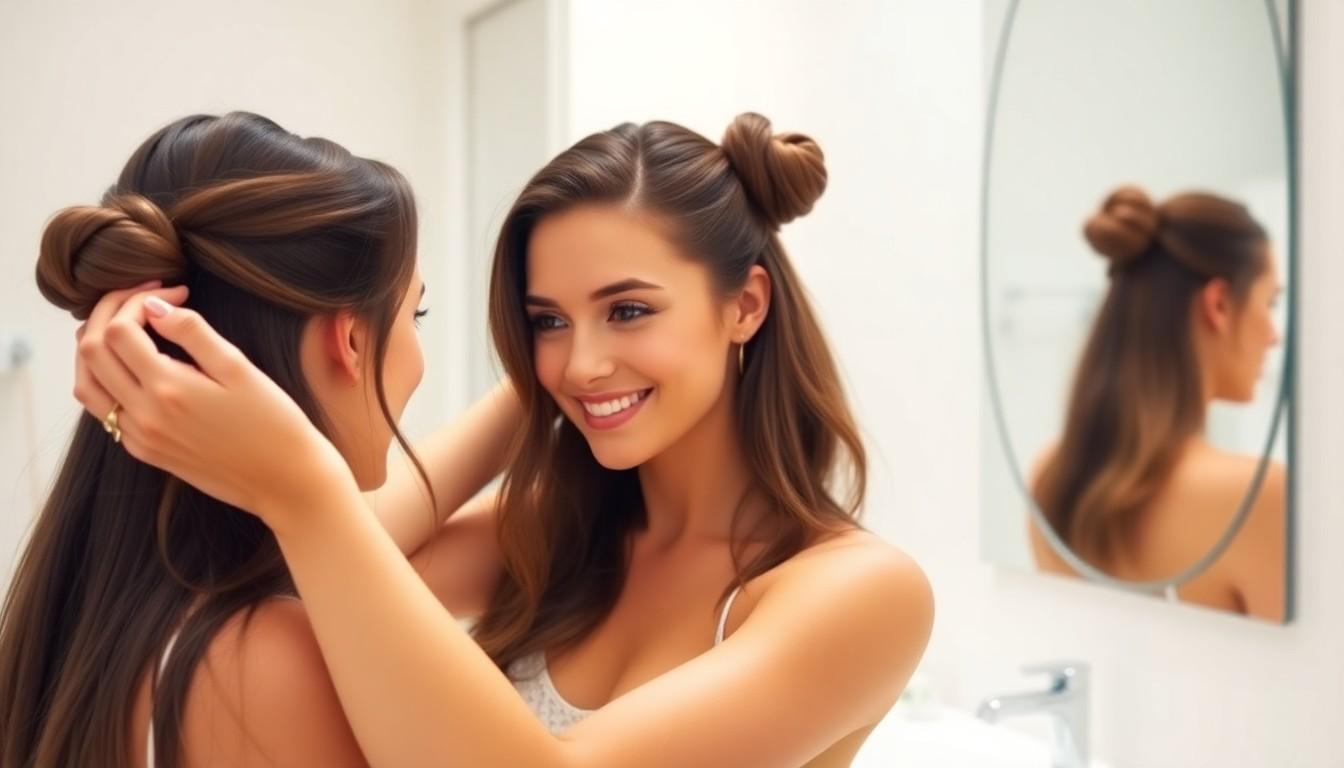
The sock bun technique offers a foolproof method for achieving that perfectly rounded, donut-shaped bun that looks polished and elegant. Creating this style requires just a few simple steps and minimal tools, making it accessible for everyone regardless of styling experience. Here’s how to master the sock bun:
- Prepare Your Hair – Brush through your hair thoroughly to remove any tangles and create a smooth base for your bun.
- Create Your Sock Donut – Take an old sock and cut off the toe section to create a tube. Roll the sock from the cut end toward the elastic until it forms a perfect donut shape.
- Position Your Ponytail – Gather all your hair into a ponytail at your desired height (high for a topknot effect or low for a more formal look) and secure with a hair tie.
- Insert the Sock Donut – Pull your ponytail through the center of the sock donut and spread the hair evenly around it.
- Wrap and Tuck – Carefully wrap the ends of your hair around the sock, tucking them under the donut as you work your way around.
- Secure the Style – Place bobby pins strategically around the bun to secure any loose ends and hold everything in place.
- Perfect the Look – Smooth any flyaways with a light hairspray and adjust the bun to your desired fullness and shape.
DIY Sock Bun Tool Options
Not everyone has spare socks to sacrifice for hairstyling, but several alternatives can help you achieve the same perfect donut bun:
Foam Bun Makers provide a structured base similar to sock donuts but are specifically designed for creating uniform buns. These lightweight tools come in various sizes to accommodate different hair lengths and desired bun volumes.
Bun Rings offer another excellent option for creating perfect circular buns without a sock. The rigid structure helps maintain the round shape while giving you control over how tight or loose you want your bun to appear.
Velcro Bun Rolls simplify the process by eliminating the need for excessive bobby pins. Their self-gripping material helps hold hair in place while you wrap and style, making them particularly useful for beginners or those with slippery hair textures.
Mesh Donut Forms create lighter-weight buns that can be ideal for those with fine hair who want volume without heaviness. These breathable options allow for comfortable all-day wear while maintaining the classic donut shape.
Hairstyles That Start With a Sock Bun Base
The versatility of the sock bun makes it a perfect foundation for many hairstyle variations:
Classic Donut Bun represents the most straightforward application of the sock bun technique. This sleek, polished style works beautifully for professional settings or formal events where a clean-lined silhouette is appropriate.
Messy Sock Bun transforms the traditional neat look by strategically loosening strands around the face and bun. After creating your sock bun, gently pull out a few pieces of hair around your face and slightly loosen the top of the bun for an effortlessly chic vibe.
Braided Sock Bun adds intricate detail to the standard style. Braid your ponytail before wrapping it around the sock donut to create beautiful texture and dimension that elevates this look for special occasions.
Low Sock Bun sits elegantly at the nape of your neck for a sophisticated silhouette. This position works particularly well for showcasing statement earrings or necklaces and offers a comfortable option for all-day wear.
Twisted Sock Bun incorporates gentle twists into your hair before wrapping around the sock. Divide your ponytail into two or three sections, twist each piece, then wrap around the donut for a more textured, interesting bun that catches the light beautifully.
Protective Bun Styles for Natural Hair
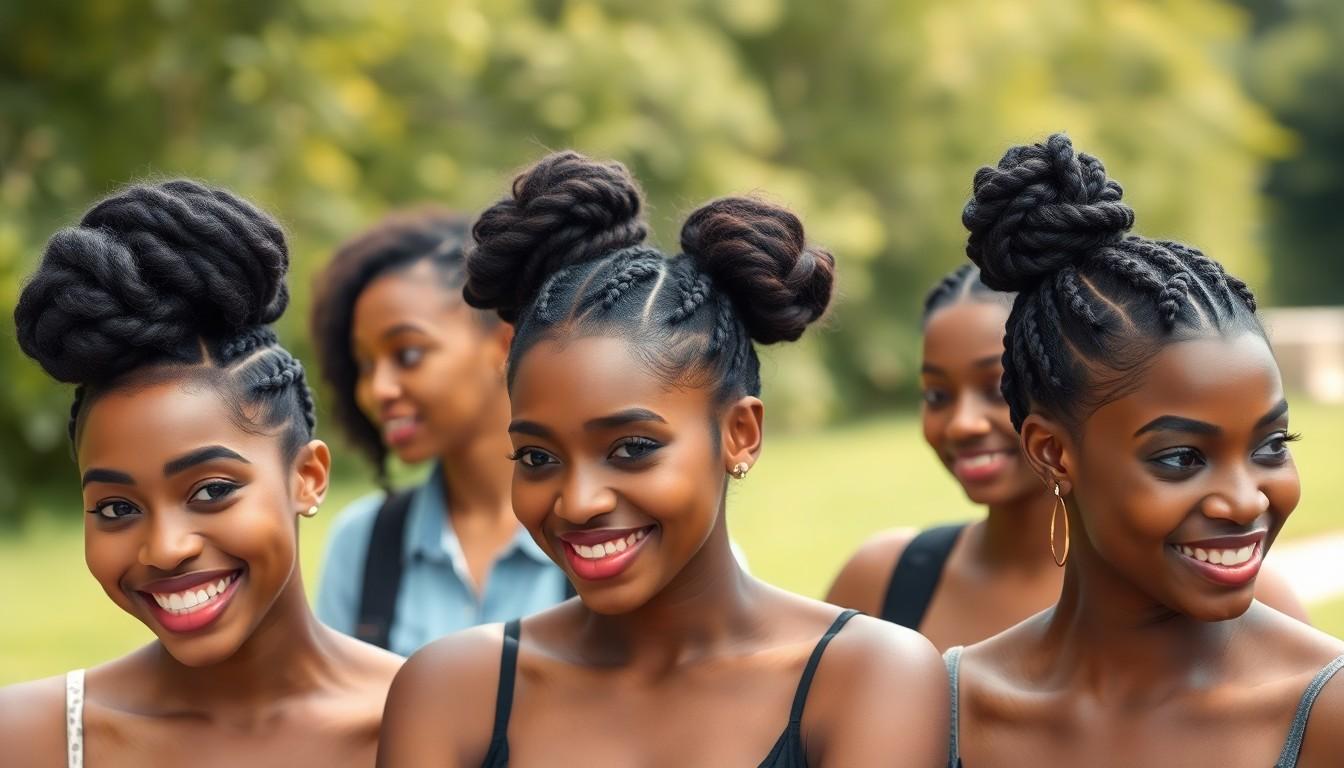
Protective bun styles offer natural hair enthusiasts a way to minimize manipulation, reduce breakage, and promote hair growth. These versatile styles not only look beautiful but also serve a functional purpose in preserving your hair’s health and length.
- High Buns – Create this classic style by gathering your hair at the crown and securing it loosely with a snag-free hair band. This elegant updo keeps hair tucked away while distributing tension evenly across the scalp, preventing strain on fragile strands.
- Low Buns – Position your bun at the nape of your neck for a sophisticated look that reduces tension on your hairline. Low buns work wonderfully for professional settings while keeping ends protected from environmental damage and friction.
- Two Buns – Divide your hair evenly and create buns on either side of your head or position one on top and one at the back. This dual-bun arrangement evenly distributes weight and tension, making it ideal for those with thicker hair textures.
- Twisted Bun Updo – Begin by creating several twists throughout your hair, then gather them together into a bun. The initial twisting helps reduce frizz while adding beautiful texture and dimension to the final style.
Moisturizing Tips for Bun Hairstyles on Natural Hair
- Pre-Style Moisture Application – Apply a generous amount of leave-in conditioner or moisturizing cream before styling to ensure your hair stays hydrated throughout the day. Focus on distributing the product evenly from roots to ends.
- Hydrating Serums for Ends – Add a protective layer of hydrating serum or natural oil to the ends of your hair before tucking them into your bun. This extra protection helps prevent the brittleness and breakage that often occurs at the most vulnerable part of your hair shaft.
- Nighttime Protection – Cover your bun with a silk or satin scarf before sleeping. This fabric’s smooth texture prevents moisture loss and reduces friction that can lead to breakage and frizz overnight.
- Tension Awareness – Ensure your bun sits comfortably without pulling too tightly at the roots or edges. Excessive tension not only causes discomfort but can lead to dryness and breakage along the hairline.
Low-Manipulation Bun Styles That Protect Ends
- Simple Scrunchie Bun – Gather your hair into a loose ponytail and secure it with a fabric scrunchie, then twist the hair around the base and secure with another scrunchie. This method reduces stress on your ends by using gentle fasteners instead of elastic bands or pins.
- Top Knot Bun – Pull your hair to the crown of your head, twist it around itself, and secure with bobby pins or a hair tie. Top knots keep your ends safely tucked away while minimizing the need for daily styling and manipulation.
- Bantu Knot Bun – Section your hair and create several small Bantu knots, then gather these knots together to form a larger bun. This technique provides double protection by first securing small sections of hair in knots, then combining them into a more substantial protective style.
- Loose Twisted Bun – Create two-strand twists throughout your hair, then gently gather them into a bun shape. Twisting before bunning adds an extra layer of protection while creating beautiful texture and dimension in your finished style.
Bun Hairstyles for Different Hair Lengths and Textures

Many people believe buns are only for those with long, thick hair, but these versatile styles can work beautifully across all hair types and lengths. We’ve compiled expert answers for creating stunning buns regardless of your hair’s natural characteristics.
For Short Hair
Short-haired beauties can absolutely rock bun styles with the right techniques. Mini buns or small top knots offer the most practical option for shorter locks. Create these by gathering the top section of your hair and securing it with bobby pins or a small hair tie. This approach not only keeps hair off your face but adds an elegant touch to shorter styles while maintaining a modern aesthetic.
For Long Hair
Those blessed with long tresses have many bun options at their disposal. The double stitched bun works particularly well for women with voluminous and textured long hair. This sophisticated style incorporates two distinct braided sections woven into or around the main bun structure, beautifully showcasing your hair’s natural fullness and creating a statement look for special occasions.
For Various Textures
Different hair textures call for specialized bun techniques that enhance your natural pattern. Braided buns with fishtail accents complement a wide range of hair textures and can be adapted to various lengths. These styles remain popular among modern brides seeking contemporary themes while honoring traditional updo elements.
Messy braided buns offer versatility for all hair textures and provide an effortless, casual appearance. Their scruffy braiding and novelty strips make them suitable for both everyday wear and formal events, giving you styling flexibility without sacrificing polish.
Short Hair Bun Answers and Mini Bun Ideas
Creating buns with short hair requires creativity but yields stunning results. A mini top knot works perfectly for very short hair—simply gather a small section from the crown and secure it with bobby pins or a tiny hair tie for an effortless, chic look.
Half-up mini buns provide another excellent option for slightly longer short hair. Take the top half of your hair and twist it into a small bun while leaving the lower portion loose. This style balances the structured look of a bun with the casual feel of loose hair.
Twisted mini buns add visual interest and can make short hair appear longer. Twist your hair tightly before securing it into a mini bun to create texture and dimension, giving the illusion of fuller hair while maintaining a sleek appearance.
Techniques for Creating Volume in Fine Hair Buns
Fine-haired individuals often struggle with creating substantial-looking buns, but several techniques can help. Gently teasing the roots before styling adds important volume to your bun—just be careful to avoid excessive damage while backcombing.
Using volume-improving products transforms fine hair buns from flat to fabulous. Specialized shampoos, conditioners, and styling products containing ingredients that lift hair from the roots create the foundation for fuller-looking buns.
Hair donuts or bun makers serve as game-changers for those with fine hair. These affordable tools provide a solid base around which you can wrap even the thinnest hair to create the appearance of a much fuller, more substantial bun.
Layering and texturizing techniques make fine hair appear thicker when styled into buns. Strategic haircuts with layers create natural volume, while texturizing sprays and dry shampoo add grit and lift to fine strands, creating the perfect canvas for volumized bun styles.
Conclusion: Finding Your Signature Bun Hairstyle
Bun hairstyles truly offer something for everyone. From sleek ballerina buns to playful space buns we’ve explored how these versatile styles can elevate your look for any occasion.
What makes buns so special is their adaptability to all hair types textures and lengths. Whether you’re seeking protection for natural hair a professional office style or a festival-ready look there’s a bun that perfectly suits your needs.
We encourage you to experiment with these timeless yet trendy styles. With just a few bobby pins and some practice you’ll discover your signature bun that balances your personal style with practicality. Remember the perfect bun isn’t just about following steps—it’s about making the style uniquely yours.
Frequently Asked Questions
What makes bun hairstyles so popular?
Bun hairstyles remain popular due to their versatility and timeless elegance. They can be adapted for any occasion, from casual outings to formal events, and work well with different hair types and personal styles. Most bun styles are quick to create, offering a polished look with minimal effort, making them a practical yet sophisticated choice for everyday wear and special occasions alike.
Can I create a bun with short hair?
Yes, short hair can be styled into mini buns or half-up mini buns. Focus on securing small sections with bobby pins and using texturizing products for grip. For very short hair, try partial buns that incorporate only the top or side sections. Hair accessories can enhance the look and help secure shorter strands that might not reach the full bun.
How do I make a perfect ballerina bun?
Start with smoothed, brushed hair gathered into a high ponytail. Apply gel or pomade for sleekness. Twist the ponytail and wrap it around its base, securing with pins as you go. Use a hairnet in a matching color for extra hold. Finish with hairspray for a polished look. This classic style works well for formal events but is versatile enough for everyday wear.
What’s the quickest way to create a messy bun?
For a quick messy bun, gather hair into a loose ponytail, twist it slightly, and wrap around the base without pulling the ends through completely. Secure with pins and gently tug sections to create volume and texture. The entire process takes about two minutes. Use texturizing spray beforehand for better hold and that perfectly undone look.
Are bun hairstyles good for professional settings?
Absolutely. Sleek low buns are particularly ideal for workplace environments as they keep hair neat while projecting confidence and professionalism. Apply a smoothing serum to tame frizz, gather hair at the nape of your neck, twist and secure with pins. This style can be accessorized with subtle hair clips or pins for a refined, business-appropriate appearance.
How can I make my bun stay in place all day?
For long-lasting buns, start with day-old hair or apply dry shampoo for grip. Secure your bun with the right tools: use bobby pins in a criss-cross pattern, hair ties without metal parts, and finish with a strong-hold hairspray. For extra security, consider using hairnets for classical buns or texture spray for messier styles. Position pins strategically to anchor the bun to your scalp.
What are space buns and when should I wear them?
Space buns are playful double buns positioned on the top or sides of the head. They’re perfect for festivals, casual outings, and creative environments. Create them by dividing hair into two sections, forming high ponytails, and wrapping each into a bun. Add glitter, colorful hair ties, or braided elements for a festive look. Half-up space buns offer a more subtle alternative.
Are bun hairstyles suitable for natural hair?
Yes, bun hairstyles can be excellent protective styles for natural hair. Options like high buns, low buns, and twisted bun updos minimize manipulation and reduce breakage. Always moisturize hair before styling, use hydrating serums on ends, and be mindful of tension to prevent damage. Consider styles like Bantu knot buns or loose twisted buns for low-manipulation alternatives.
How do I add volume to a bun with fine hair?
For fuller-looking buns with fine hair, try teasing the hair at the crown before styling. Use volumizing products like mousse or texturizing spray to create grip and appearance of thickness. Hair donuts or foam bun makers can instantly add size. Another trick is to pull the bun slightly looser after securing it, which creates the illusion of more volume.
Can I wear a bun for a wedding or formal event?
Absolutely. Sophisticated low chignons and braided buns are elegant choices for weddings and formal events. Side buns with decorative elements like fresh flowers or jeweled hairpins add romantic sophistication. For extra polish, try the fishtail braid bun or a sleek ballerina bun. These styles pair beautifully with formal attire while keeping hair secure throughout the event.

