Dutch braids have captured our hearts with their timeless elegance and versatility. These intricate plaits, woven close to the scalp, create a stunning dimensional effect that elevates any look from casual to red-carpet ready. Unlike their French cousins, Dutch braids stand out with their unique “inside-out” technique that makes them pop against your hair.
We’ve gathered the most stunning Dutch braid hairstyles that’ll transform your everyday look into something extraordinary. Whether you’re heading to the gym, attending a wedding, or just want to keep your hair stylishly contained during a busy day, these braided styles offer both function and fashion. They work beautifully on all hair types and lengths, making them a go-to option for anyone looking to refresh their hair game.
10 Stunning Dutch Braid Hairstyles for Every Occasion
1. Classic Double Dutch Braids
Double Dutch braids offer a timeless style that works for both casual days and active pursuits. To achieve this look, part your hair down the middle and create two separate Dutch braids on each side. This versatile hairstyle keeps hair secure while adding a touch of elegance to your everyday look. Many celebrities like Hailey Bieber and Zendaya have been spotted rocking this effortless style on red carpets and during casual outings.
2. Half-Up Dutch Braid Crown
The half-up Dutch braid crown combines elegance with practicality for special events. Start by sectioning the top portion of your hair and creating a Dutch braid along your hairline, wrapping it around like a crown. This romantic style works beautifully for weddings, proms, or date nights while keeping your face framed perfectly. You’ll love how this style showcases both braided detail and flowing locks.
3. Side Dutch Braid with Waves
A side Dutch braid paired with loose waves creates the perfect balance between structure and softness. Begin by creating a Dutch braid along one side of your head, leaving the rest of your hair in natural or styled waves. This asymmetrical look adds dimension and visual interest to your hairstyle. Fashion influencers often choose this style for festival season and spring photoshoots.
4. Dutch Braid Ponytail
The Dutch braid ponytail elevates a simple ponytail into something extraordinary for workouts or warm weather. Create a Dutch braid running from your forehead to the crown, then gather all your hair into a high or low ponytail. This functional yet stylish option keeps hair secure during physical activities while looking polished. Fitness enthusiasts particularly appreciate this style for its staying power during intense workouts.
5. Dutch Fishtail Braid
Dutch fishtail braids combine two braiding techniques for a textured, eye-catching result. Start with a traditional Dutch braid technique but incorporate the fishtail weaving pattern instead of the standard three-strand approach. This intricate style showcases dimension and detail, making it perfect for special occasions. Many wedding parties request this elaborate braid style for bridesmaids seeking coordinated yet unique looks.
6. Dutch Braid Updo
The Dutch braid updo creates a sophisticated style suitable for formal events and professional settings. Begin with one or more Dutch braids, then twist and pin them into an elegant updo shape. This versatile style can be adapted from sleek and polished to soft and romantic depending on your preference. Wedding guests and business professionals alike favor this style for its elegant aesthetic and staying power.
7. Dutch Braid Headband
A Dutch braid headband frames your face beautifully while keeping hair out of your eyes. Create a Dutch braid along your hairline from ear to ear, leaving the rest of your hair down or styled as desired. This face-framing style works wonderfully for highlighting your features while maintaining a polished appearance. College students love this practical yet cute option for classes and study sessions.
8. Reverse Dutch Braid Bun
The reverse Dutch braid bun combines structure with the classic elegance of a bun. Begin a Dutch braid at the nape of your neck, working upward toward the crown before wrapping the ends into a bun. This unexpected approach creates visual interest while keeping hair secure all day. Dance performers often choose this style for its security during movement and striking appearance on stage.
9. Dutch Mohawk Braid
The Dutch mohawk braid creates an edgy yet sophisticated statement for those wanting to stand out. Create a thick Dutch braid running along the center of your head from forehead to nape, leaving sides sleek or shaved for contrast. This bold style works wonderfully for music festivals, creative workplaces, or anytime you want to showcase your unique personality. Fashion-forward individuals appreciate this style for its modern edge and versatility.
10. Accessorized Dutch Braids
Accessorized Dutch braids take any braided style to the next level with personalized touches. Weave ribbons, add decorative pins, or incorporate colorful extensions into your Dutch braid creation. These customizable options allow you to match your hairstyle perfectly to exact events or outfits. Wedding parties particularly benefit from this approach, using floral elements or color-coordinated accessories to complement wedding themes.
What Makes Dutch Braids Different from French Braids

Dutch braids and French braids might appear similar at first peek, but they’re actually quite distinct in technique and appearance. The key difference lies in how the strands are crossed during the braiding process.
The Inside-Out Technique
Dutch braids earn their nickname as “inside-out” braids because of their unique weaving method. Starting with three equal sections of hair, you’ll cross the top strand under the middle strand instead of over it as you would with a French braid. The bottom strand also goes under the middle strand rather than over it. As you continue braiding, small sections of hair are added to the outer strands before crossing them under the middle strand. This technique creates a braid that appears to pop out from the surface of your hair, giving it that distinctive raised appearance that many find appealing. The under-crossing method is what truly sets Dutch braids apart, making them look as though they’re woven beneath the surface of your hair rather than sitting on top.
Texture and Volume Benefits
Dutch braids offer impressive advantages when it comes to improving your hair’s natural qualities. Their structure creates noticeably more volume compared to French braids since the under-crossing technique lifts hair away from the scalp, resulting in a three-dimensional effect. The texture achieved with Dutch braids adds important depth to your hairstyle, making even fine hair appear thicker and more intricate. When you eventually undo these braids, they leave behind beautiful, natural-looking waves that many find desirable for second-day styling. Dutch braids work wonderfully for various occasions, adapting easily from polished formal styles to relaxed bohemian looks depending on how tightly you braid and whether you choose to loosen sections afterward. This versatility makes them appropriate for virtually any hair type, length, or texture—explaining their enduring popularity in everyday and special occasion hairstyling.
Essential Tools and Products for Perfect Dutch Braids

Creating stunning Dutch braids requires the right tools and products to achieve that perfect, polished look. We’ve compiled a comprehensive list of everything you’ll need to master this versatile hairstyle.
Brush or Comb
A good quality brush or comb is essential for starting your Dutch braid journey. Begin by thoroughly brushing your hair to eliminate any tangles or knots, ensuring a smooth canvas for braiding. This crucial first step helps create even, clean-looking braids that stay in place longer.
Hair Ties or Bobby Pins
Securing your completed Dutch braid properly is vital for longevity. Hair ties provide overall security at the end of your braid, while bobby pins can help anchor exact sections or tame flyaways. These basic items are fundamental for maintaining your braid’s structure throughout the day.
Hair Clips (Optional)
For those with thicker or longer hair, sectioning clips become invaluable tools. They help divide your hair into manageable portions while you work on braiding one section at a time. This organization makes the braiding process significantly easier and leads to more precise results.
Must-Have Hair Accessories
Clear or bobby pins serve dual purposes – they effectively tuck away stray hairs and secure braid ends for a polished finish. These small accessories make a big difference in the overall neatness of your Dutch braid.
Hair ties or elastic bands that match your hair color create a seamless look when securing your braid. Choosing bands that blend with your hair color helps maintain the visual flow of the braid without distracting ends.
Hair slides or barrettes offer both functional and decorative benefits for your Dutch braids. These versatile accessories can elevate a simple braid with decorative elements while simultaneously securing loose strands for a cleaner appearance.
Best Products for Grip and Hold
Hairspray provides essential staying power, especially for those with fine hair. A light-hold formula prevents your meticulously crafted Dutch braid from loosening throughout the day without creating stiffness or crunchiness.
Hair serum or oil applied sparingly helps manage flyaways and adds a healthy shine to your braided style. These products enhance the overall appearance of your Dutch braid by creating smoother, more defined sections.
Texturizing spray or dry shampoo creates necessary volume and grip in hair that might otherwise be too slippery for braiding. These products add dimension to your braid, making it appear fuller and more elaborate than it would naturally.
Hair wax or pomade offers additional control for those with particularly fine or smooth hair. Applying a small amount to each section before braiding significantly improves grip and ensures your Dutch braid maintains its structure throughout wear.
Basic Dutch Braid Tutorial for Beginners
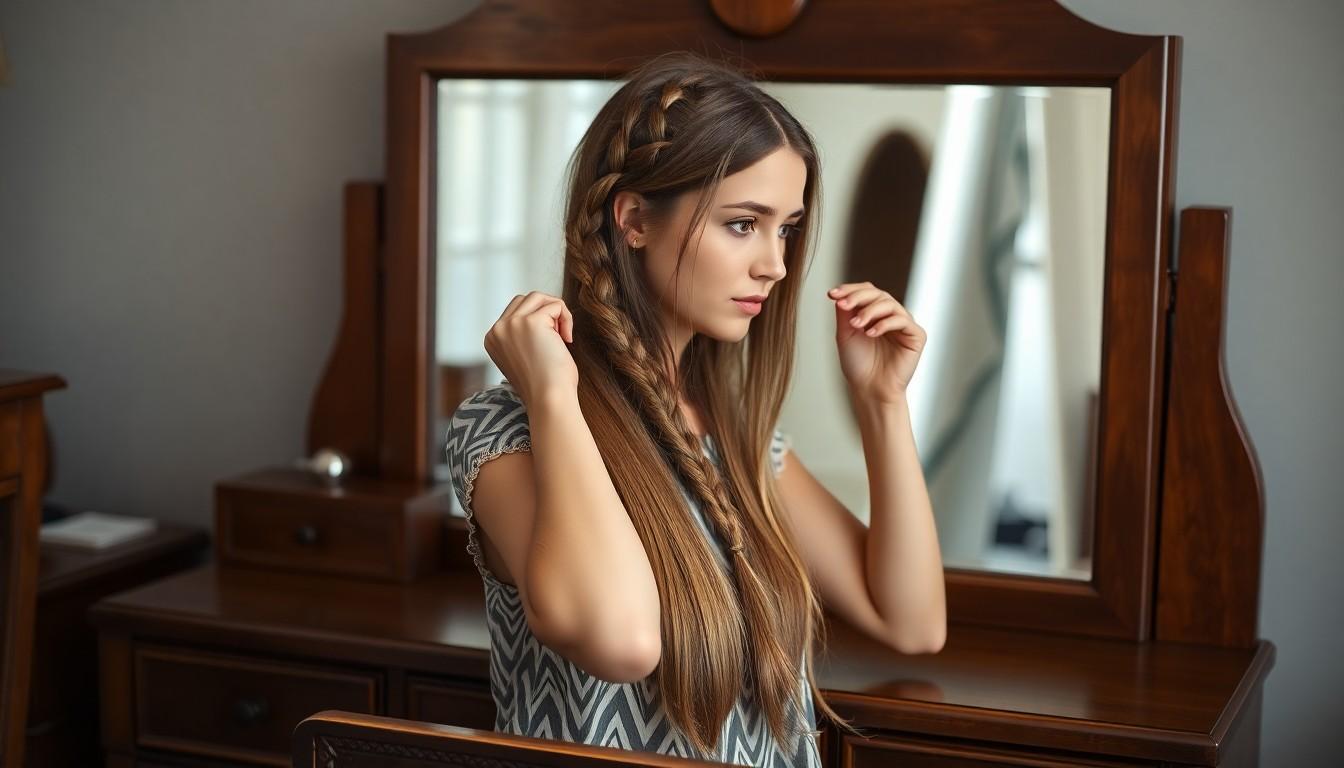
Ready to master the Dutch braid? We’ve broken down this versatile technique into simple, manageable steps that anyone can follow.
Step-by-Step Instructions
- Preparation
Brush your hair thoroughly to remove all tangles and knots. Starting with smooth, detangled hair makes the braiding process much easier and ensures a cleaner finish.
- Starting the Braid
Take a small section of hair from the front of your head, around the temple area. Divide this section into three equal parts, keeping them separate and identifiable.
- Braiding Technique
Hold the three strands in one hand with the top strand between your thumb and index finger, the middle strand on your middle finger, and the bottom strand on your pinky. Cross the top strand under the middle strand, then cross the bottom strand under the middle strand. This under-crossing motion creates the distinctive raised look of a Dutch braid.
- Adding Hair
Pick up a small section of hair near the front strand and combine it with the front strand. Cross this thicker strand under the middle. Next, grab a small section of hair near the back strand, add it to the back strand, and cross it under the middle. This consistent adding of hair creates the connected look of the braid.
- Continuing the Braid
Continue adding hair to both front and back strands before crossing them under the middle. Keep the braid tight by gently pulling the strands as you work. Maintain tension on two sections while you’re adjusting the third for best results.
- Finishing the Braid
Repeat until you’ve braided to your desired length, typically behind your ear or further down. Secure the end with a hair tie to keep your Dutch braid in place.
Common Mistakes to Avoid
- Inconsistent Tension
Maintain even tension throughout your braiding process. Braids that are too loose tend to unravel quickly, while overly tight braids can cause discomfort and headaches.
- Incorrect Crossing
Remember that Dutch braids require crossing strands under the middle section, not over. Crossing over would create a French braid instead of the raised Dutch braid effect we’re aiming for.
- Uneven Hair Addition
Add similar amounts of hair to both the front and back strands each time. Uneven additions lead to asymmetrical braids that may tilt to one side or appear lopsided.
- Letting Sections Loosen
Keep two sections firmly held while working with the third. Many beginners make the mistake of loosening their grip on all sections, causing the braid to fall apart mid-process.
Classic Single Dutch Braid for Everyday Wear
Basic Technique
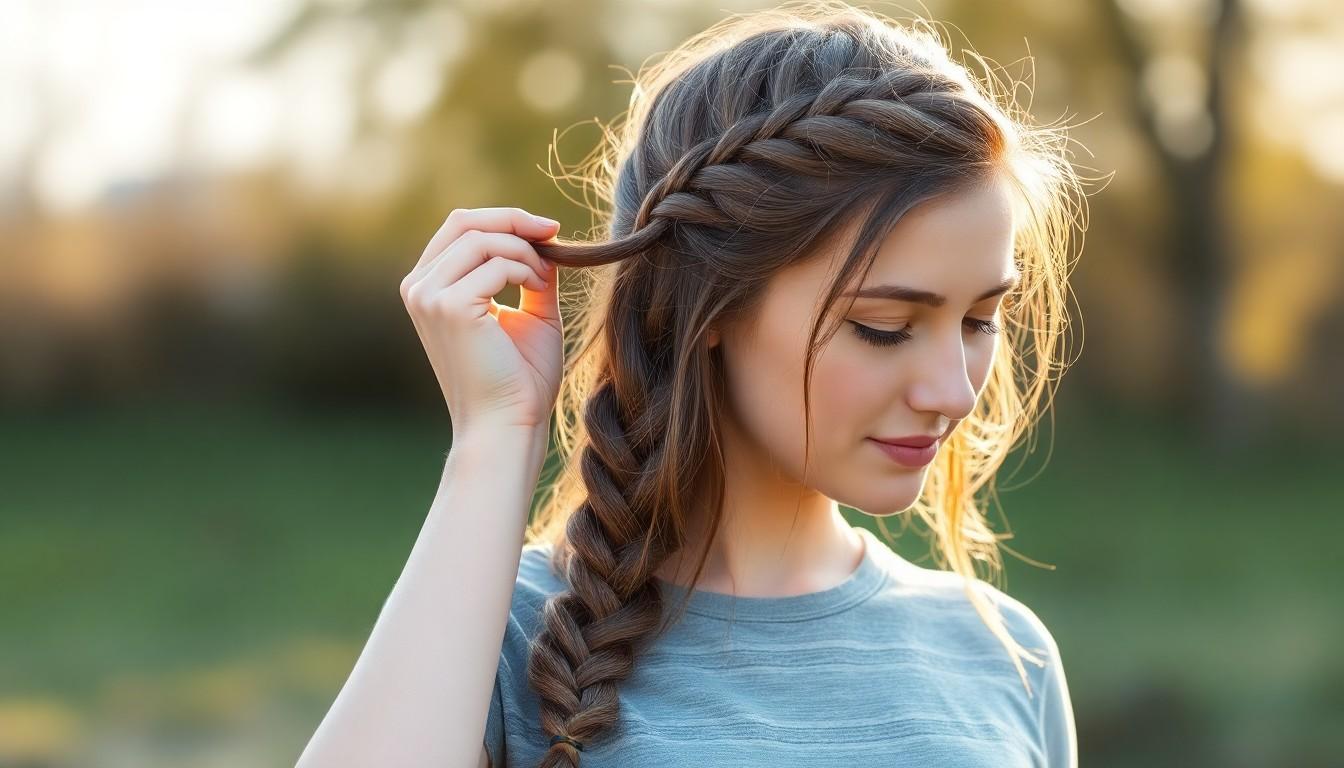
The Dutch braid, often referred to as an inside-out French braid, creates a stunning three-dimensional look that stands out beautifully against your hair. Unlike traditional braids, this technique involves crossing hair strands under each other instead of over, resulting in a more textured and prominent appearance. Begin by dividing the hair at the top of your head into three equal sections to create a solid foundation for your braid.
Step-by-Step Process
Start your Dutch braid by crossing the right strand under the middle strand, then follow with the left strand going under the new middle section. After these initial crosses, incorporate a small section of hair from the right side and add it to your right strand before crossing it under the middle. Continue this pattern on the opposite side by taking a section from the left and combining it with your left strand before crossing under. Maintain consistency throughout the braiding process by always crossing strands under the middle section to achieve that characteristic raised look.
Tips for Everyday Wear
Create an effortlessly elegant look by starting your Dutch braid at the crown of your head and continuing down to the nape of your neck or all the way to your hair ends. For a more relaxed and contemporary style, gently pull at the edges of your completed braid to loosen it slightly, giving it that coveted “pancaked” effect. Secure the end with a small elastic band in a matching hair color, and for an extra polished finish, try tucking the tail end under the rest of your braid and pinning it discreetly.
Variations
While the classic single Dutch braid offers a timeless style, we can enhance it with several variations to suit different occasions. Try framing your face with a few loose strands for a softer, more romantic look that works perfectly for both casual and semi-formal events. Add extra texture and hold to your braid by applying a light mist of texturizing spray before braiding, which helps prevent slippage and maintains the style throughout the day. These simple modifications allow you to customize your Dutch braid while maintaining its everyday wearability.
Double Dutch Braids for Athletic Activities
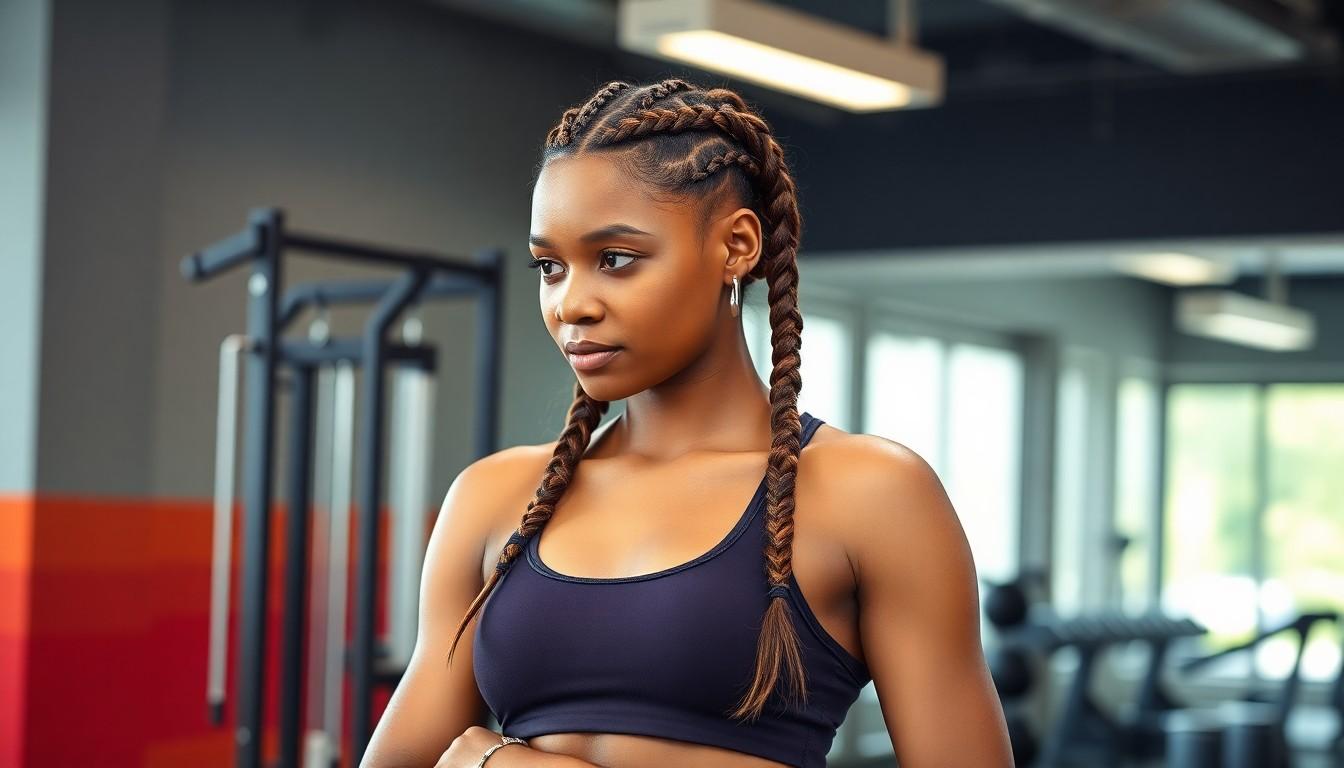
Double Dutch braids are the perfect solution for keeping hair secure and out of your face during any physical activity. These braids not only look stylish but also offer practical benefits that make them a go-to choice for athletes and fitness enthusiasts.
Gym-Ready Double Dutch Pigtails
Creating gym-ready Double Dutch pigtails starts with dividing your hair into two equal sections down the middle of your head. Unlike traditional braids, Dutch braids require weaving the outer strands under the middle section instead of over, which creates that signature raised appearance. This technique ensures the braids lie flat against your head, significantly reducing the chance of them coming undone during even the most intense workouts. For maximum security, continue braiding all the way to the ends of your hair and secure each braid with small, durable hair ties. The result is a stylish yet functional hairstyle that will stay put through cardio, weightlifting, or yoga sessions.
Secure Dutch Braids for Workouts
Achieving workout-proof Dutch braids requires proper preparation and technique. Always begin with clean, thoroughly brushed hair to minimize tangles that could compromise the braid’s structure. Apply a small amount of hair serum to reduce frizz and enhance grip before starting the braiding process. When creating your Dutch braids, pull the strands taut but not painfully tight—finding this balance ensures comfort during exercise while maintaining security. Incorporate all loose hairs into your braid to prevent flyaways, and secure the ends with small elastic bands that won’t slip during movement. For added security during high-intensity activities, consider using bobby pins to anchor any vulnerable sections, particularly around the nape of your neck. Tighter weaves generally offer more security for activities like running or jumping, while slightly looser braids can work well for lower-impact exercises when properly secured.
Dutch Braid Crown for Elegant Events
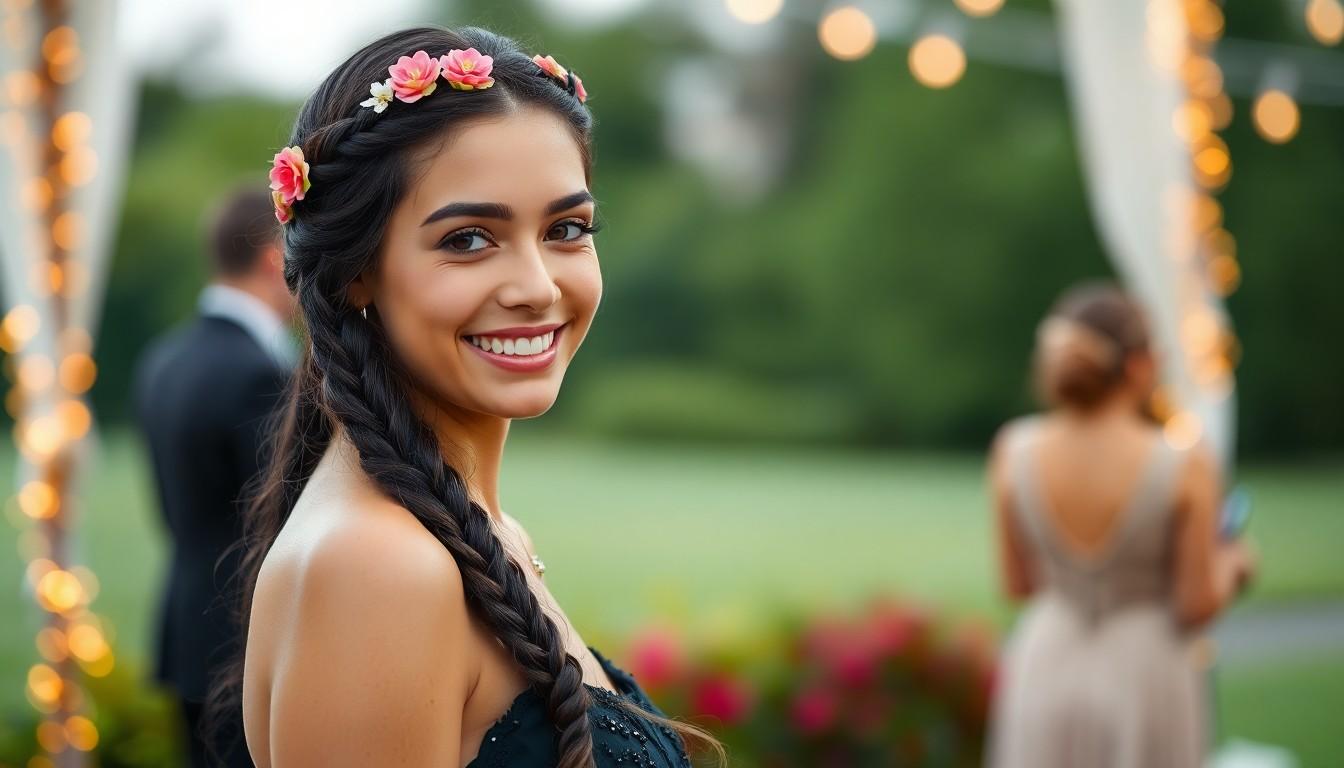
A Dutch braid crown stands out as a sophisticated and elegant hairstyle perfect for formal occasions like weddings, proms, and special events. We’ve created a comprehensive guide to help you master this stunning look that combines intricate braiding with a regal silhouette.
Steps to Create a Dutch Braid Crown
- Prepare your hair by thoroughly brushing out any tangles and applying a smoothing spray or cream to control flyaways.
- Start with a small section from the front of your head and divide it into three equal parts.
- Begin the Dutch technique by crossing the top strand under the middle strand, then the bottom strand under the middle. This under-crossing motion creates the signature raised appearance that distinguishes Dutch braids from French braids.
- Continue braiding while adding small sections of hair to both the top and bottom strands before crossing them under the middle. Keep the tension consistent for a polished look.
- Braid around your head following the hairline in a circular motion. Maintain a tight braid and continue adding hair as you progress to preserve the crown shape.
- Secure the end with a small elastic band or bobby pins, then tuck the end under the rest of your hair for a seamless finish.
Formal Occasion Variations
- Double Dutch Braid creates an extra dimension of elegance by forming two braids that intersect or wrap around each other. This sophisticated variation adds complexity and visual interest to your formal look.
- Side Swept Braid offers asymmetrical sophistication by starting the braid on one side of your head and working around to the opposite side. This technique creates a flattering frame for your face while maintaining the crown-like appearance.
- Volumized Crown can be achieved by gently pulling on the edges of your completed braid. This strategic loosening creates a fuller, more dramatic crown that photographs beautifully at formal events.
Adding Accessories to Your Crown Braid
- Decorative Hair Pins can elevate your Dutch braid crown instantly. Place these strategically to secure any loose strands or add subtle sparkle that complements your formal attire.
- Elegant Hair Clips work wonderfully to secure the braid’s end or add decorative elements to your crown. These accessories prove especially useful for shorter hair or when you want to incorporate a special detail into your look.
- Floral or Beaded Accents transform a simple Dutch braid crown into a truly show-stopping style. These can be woven directly into the braid during creation or added afterward as finishing touches. For wedding occasions, fresh flowers or crystal beads create a particularly elegant effect.
Half-Up Dutch Braid Styles for Casual Outings

Looking for a versatile hairstyle that’s perfect for casual outings yet still makes a statement? Half-up Dutch braid styles offer the perfect balance between elegance and effortlessness.
Half-Up Dutch Braid
The half-up Dutch braid creates a beautiful dimensional look while keeping most of your hair flowing freely. Start by sectioning the top portion of your hair from crown to temples. Divide this section into three equal strands and begin the Dutch braiding technique by crossing the outer strands under the middle one instead of over. Continue adding small sections of hair from each side as you work your way back. Secure your braid with a small elastic band when you reach the desired point, allowing the remaining hair to cascade naturally. This style works wonderfully for coffee dates, shopping trips, or casual dinners where you want to look put-together without appearing overdone.
Half-Up Dutch Braid with Curls
Pairing your half-up Dutch braid with curls creates a romantic and voluminous look perfect for brunch or afternoon gatherings. Begin by creating your half-up Dutch braid as described above, securing it firmly with an elastic band. Once your braid is secure, use a curling iron to add soft, flowing curls to the loose hair beneath your braid. The contrast between the textured braid and flowing curls adds depth and dimension to your overall style. For a more polished finish, apply a light-hold hairspray to maintain the curls throughout the day without weighing them down. This combination elevates the casual half-up style into something more refined while still maintaining that effortless appeal.
Half-Up Dutch Braid with Extensions
Transform your half-up Dutch braid into a show-stopping style by incorporating hair extensions for added length and volume. Clip in your extensions before beginning the braiding process, ensuring they blend seamlessly with your natural hair. The added thickness makes your Dutch braid appear more dramatic and eye-catching, while still maintaining the casual vibe of the half-up style. Extensions allow those with finer or shorter hair to achieve a fuller, more luxurious look that’s perfect for special casual events like festivals or outdoor parties. Secure both the braid and extensions properly to ensure comfort and longevity throughout your casual outing.
Dutch Braid Updos for Special Occasions
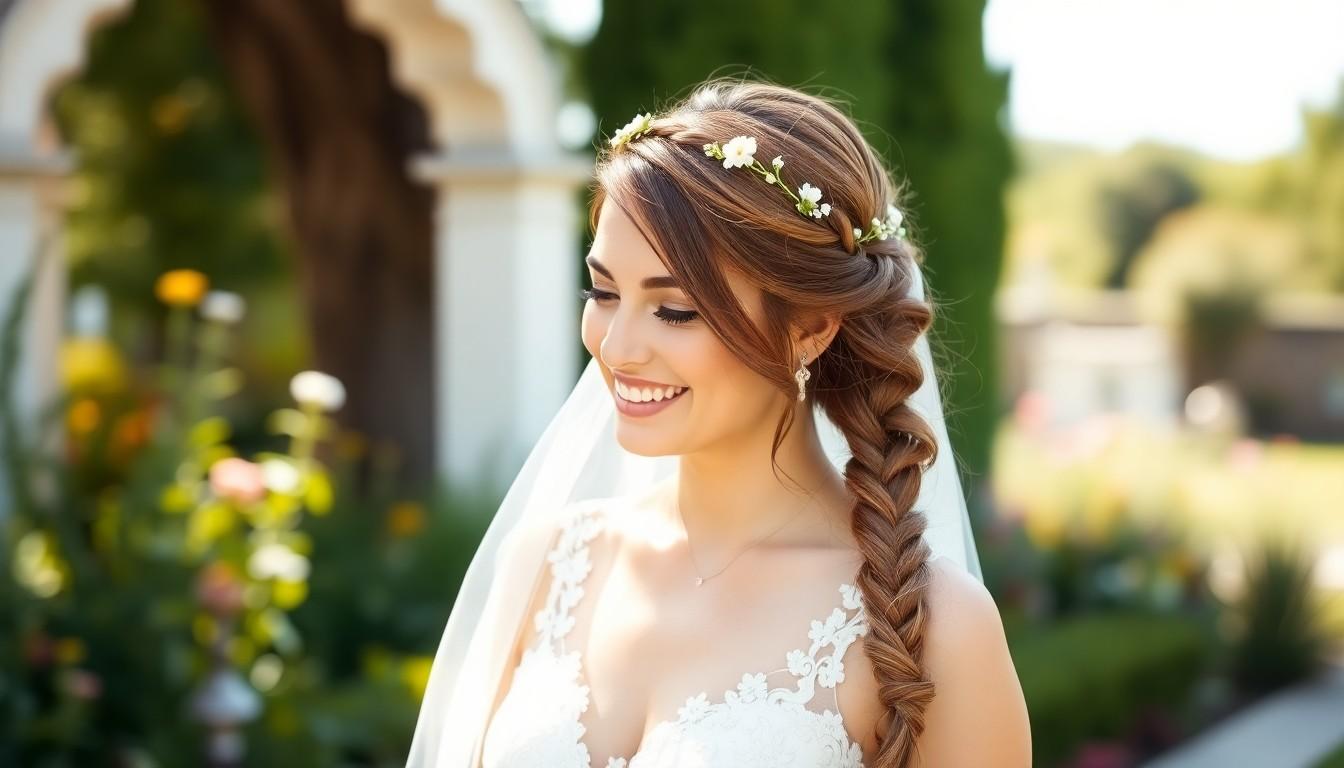
Special occasions call for extraordinary hairstyles, and Dutch braid updos deliver elegance with a distinctive three-dimensional appearance. These sophisticated styles combine the texture of Dutch braiding with the refinement of updos, creating looks perfect for weddings, galas, and formal events.
Dutch Braid Crown
The Dutch Braid Crown stands out as a stunning updo option for special occasions. This regal style features braids that encircle the head like a crown, using the underhanded Dutch braiding technique to create a pronounced, three-dimensional effect. The technique makes the braid prominently stand out from the head, giving it depth and visual interest that classic braids cannot match. Many brides choose this style for its elegant appearance and staying power throughout long celebrations.
For a more romantic version, we recommend pulling out a few face-framing tendrils to soften the look while maintaining the structural integrity of the crown. Adding small floral elements or decorative pins can elevate this style even further, making it perfect for garden weddings or formal spring events.
Dutch Braid Bun Variations
The Double Dutch Braided Bun combines intricate braiding with a polished finish. This sophisticated style begins by dividing hair down the middle and creating two Dutch braids. Braiding should stop at the nape of the neck, where you’ll gather all ends into a single section and twist them into a chic chignon. The dual braids add volume and create a unique dimension that elevates this bun beyond ordinary updos.
Another variation worth trying is the wraparound Dutch braid bun, where a single Dutch braid encircles a central bun. This technique creates a textured, layered effect that photographs beautifully from all angles. Secure areas where the braid meets the bun with decorative pins for both function and style, ensuring your updo remains intact throughout evening events.
Dutch Braid Chignon Styles
The Dutch Braid Chignon offers a sophisticated yet achievable look for formal occasions. Creating this style involves braiding hair using the Dutch technique and then artfully twisting the braid into a low chignon. Customization options include leaving a few strands loose around the face for a more relaxed, romantic appearance while maintaining the elegant structure of the updo.
More intricate versions incorporate multiple Dutch braids into a single chignon. Braiding two or more sections separately before combining them into one chignon adds remarkable texture and depth to the hairstyle. This approach works beautifully for those with thicker hair, as it distributes weight more evenly across the head while creating visual interest through the braid patterns. Formal events like black-tie galas or evening weddings pair perfectly with these more elaborate Dutch braid chignon styles.
Dutch Braids for Different Hair Lengths and Textures
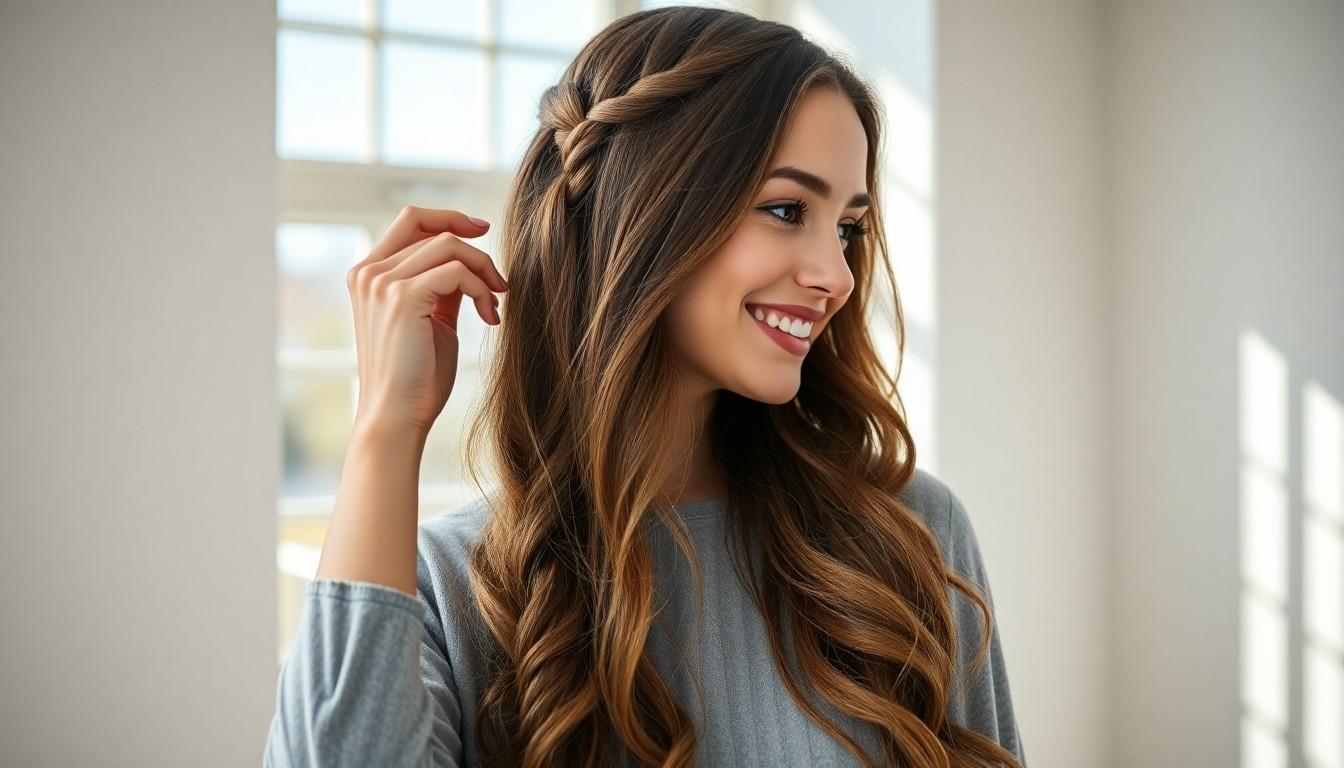
Dutch braids, also known as inside-out braids, can be adapted for various hair types and lengths with the right techniques. These stunning braids essentially reverse the traditional French braid method by crossing strands under instead of over, creating a beautiful raised effect.
General Technique
The basic Dutch braid technique involves a simple reversal of the French braid method:
- Begin with three small sections of hair near the front of your head
- Cross the top strand under the middle strand
- Follow by crossing the bottom strand under the middle strand
- Continue by adding new hair to each section as you braid, maintaining the under-crossing pattern
This foundation technique can be modified to work with different hair types and lengths.
Short Hair Dutch Braid Adaptations
Creating Dutch braids on short hair requires some clever adjustments to make the most of limited length. Working with shorter locks doesn’t mean you can’t achieve this stunning style.
Start with significantly smaller sections when Dutch braiding short hair. The limited length means you’ll need tighter, more compact braiding to keep everything secure and neat.
Using clips becomes essential for very short styles, allowing you to temporarily secure top sections while working on lower portions of the braid. This organization helps prevent shorter pieces from slipping out during the braiding process.
Focus your braiding efforts on the sides rather than starting from the crown when working with shorter hair. Side braids maximize the available length and create a more defined look that works beautifully with shorter cuts.
Curly and Textured Hair Techniques
Dutch braids showcase natural texture beautifully, but curly and textured hair requires special consideration to achieve the best results.
Prep your curly or textured hair thoroughly before braiding by using a smoothing spray or cream to manage flyaways and add shine. This preparation step creates a more manageable foundation for your braid work.
Apply a quality detangling spray specifically formulated for curly hair to make combing and braiding significantly easier. This product helps prevent unnecessary breakage while maintaining your natural texture.
Braid with gentle tension when working with curly or textured hair to avoid causing damage or creating uncomfortable tightness. Your braiding technique should respect the natural movement and structure of textured hair.
Add new hair sections carefully and deliberately to maintain the beautiful texture while creating a balanced braid that’s neither too tight nor too loose. This mindful approach preserves the integrity of your natural hair pattern.
Loosen your completed braid by gently pulling on the outer edges to enhance volume and showcase your natural texture. This technique creates a more relaxed, voluminous appearance that highlights the beauty of curly and textured hair.
For successful Dutch braids on any hair type, use appropriate tools like wide-tooth combs or your fingers to carefully section hair, especially beneficial for curly or textured styles. With regular practice, you’ll master adapting this versatile braiding technique to work perfectly with your unique hair length and texture.
Maintenance Tips to Keep Your Dutch Braids Looking Fresh
Dutch braids have secured their place as one of the most versatile and striking hairstyles available. From casual double braids for gym sessions to elegant crown braids for formal occasions, there’s truly a Dutch braid for every event and hair type.
We’ve seen how these intricate plaits can transform your look while offering practicality and style. With the right tools, products, and techniques, you’ll be creating flawless Dutch braids in no time.
Whether you’re a beginner just starting your braiding journey or looking to expand your styling repertoire, Dutch braids offer endless possibilities. Try one of these gorgeous styles today and discover why they’ve remained a favorite across generations and continue to evolve with current trends.
Frequently Asked Questions
What is a Dutch braid and how is it different from a French braid?
A Dutch braid is created using an “inside-out” technique where strands are crossed under the middle section, creating a raised, 3D appearance. Unlike French braids, where strands go over the middle section, Dutch braids stand out from the head rather than lying flat against it. This technique makes the braid appear more prominent and textured, giving the illusion of thicker hair.
Are Dutch braids suitable for all hair types?
Yes, Dutch braids work well for all hair types and lengths. They can be adapted for short hair by creating smaller sections and using clips to secure shorter pieces. For curly or textured hair, using smoothing products and maintaining gentle tension helps preserve the natural texture while creating a neat braid. The versatility of Dutch braids makes them accessible regardless of your hair type.
What tools do I need to create Dutch braids?
Essential tools include a good quality brush or wide-tooth comb for detangling, hair ties and bobby pins for securing the braid, and sectioning clips for managing thicker hair. Product-wise, consider hairspray for hold, hair serum for shine, texturizing spray for grip, and hair wax for taming flyaways. Clear pins and decorative hair accessories can also enhance the finished look.
What are the most common mistakes when creating Dutch braids?
Common mistakes include inconsistent tension (causing uneven braids), crossing strands incorrectly (over instead of under), adding uneven amounts of hair to each section, and allowing sections to loosen while braiding. Another frequent error is braiding too tightly, which can cause discomfort and scalp tension. Practice maintaining consistent technique throughout the entire braiding process.
How can I make my Dutch braids last longer?
To extend the life of your Dutch braids, start with slightly dirty hair or add texturizing spray for grip. Braid with consistent, firm tension (but not too tight). Secure the ends well with small elastics and use hairspray to set the style and tame flyaways. At night, wrap your hair in a silk or satin scarf to reduce friction and prevent frizz.
Can I create Dutch braids for formal occasions?
Absolutely! Dutch braids are versatile enough for formal events. Consider styles like the Dutch Braid Crown, Dutch Braid Updo, or Dutch Braid Chignon for elegant occasions. These sophisticated variations work beautifully for weddings, proms, and galas. Adding decorative accessories like pearl pins, fresh flowers, or ornate hair clips can elevate the look for special events.
How do I create Dutch braids for workouts?
Double Dutch braids are perfect for workouts. Start with dry, detangled hair and divide it into two sections. Create two Dutch braids, securing them tightly at the ends with durable elastics. For extra security during intense activities, pin any loose sections with bobby pins and finish with a light hairspray. This style keeps hair secure and sweat-free during physical activity.
Can I create Dutch braids on short hair?
Yes, Dutch braids are possible on short hair with some modifications. Work with smaller sections, use clips to secure shorter pieces while braiding, and apply products for extra grip. Focus on tighter braids near the scalp and don’t worry if some pieces fall out—simply secure them with bobby pins. Mini Dutch braids or a Dutch braid headband works well for shorter lengths.


